
Crafting a Stylish Medium Open Top Canvas Tote Bag with Two Complementary Fabrics
- Baylin Bruell
- Feb 11
- 6 min read

Creating a medium open top canvas tote bag is a rewarding project for sewers of all levels. Using two complementary fabrics adds a unique style and personality to the bag, making it both functional and fashionable. This sewing tutorial guides you through the process step-by-step, helping you build a versatile tote with six pockets for extra organization. Whether you are a beginner or an intermediate sewer, this medium tote bag tutorial will provide clear instructions and practical tips to complete your project with confidence.

Materials Needed
Sewing machine
2 yards of complimentary fabrics, 1 yard of each
Pellon Fusible Interfacing plf36 or Pellon Fusible Fleece 987F (optional)
Matching or complimentary thread
Tape measure & ruler
fabric chalk
Scissors
Choosing Your Fabrics and Supplies
The first step in this project is selecting two fabrics that complement each other well. Canvas is an excellent choice for durability and structure. Pair it with a lighter cotton or linen fabric for contrast and style.
Main fabric: Choose a sturdy canvas in a neutral, bold color or even one with a pattern.
Accent fabric: Pick a lighter fabric with a pattern or solid color that matches the main fabric. If your main fabric has a pattern you can still a patterned fabric for your accent.
Fusible interfacing/fleece: depending on fabric weight you may need interfacing/fleece. I used Pellon Fusible Interfacing plf36 to give my tote more structure.
Lining fabric: Use the accent fabric for the bag’s lining.
Thread: Use a strong polyester thread matching your fabrics.
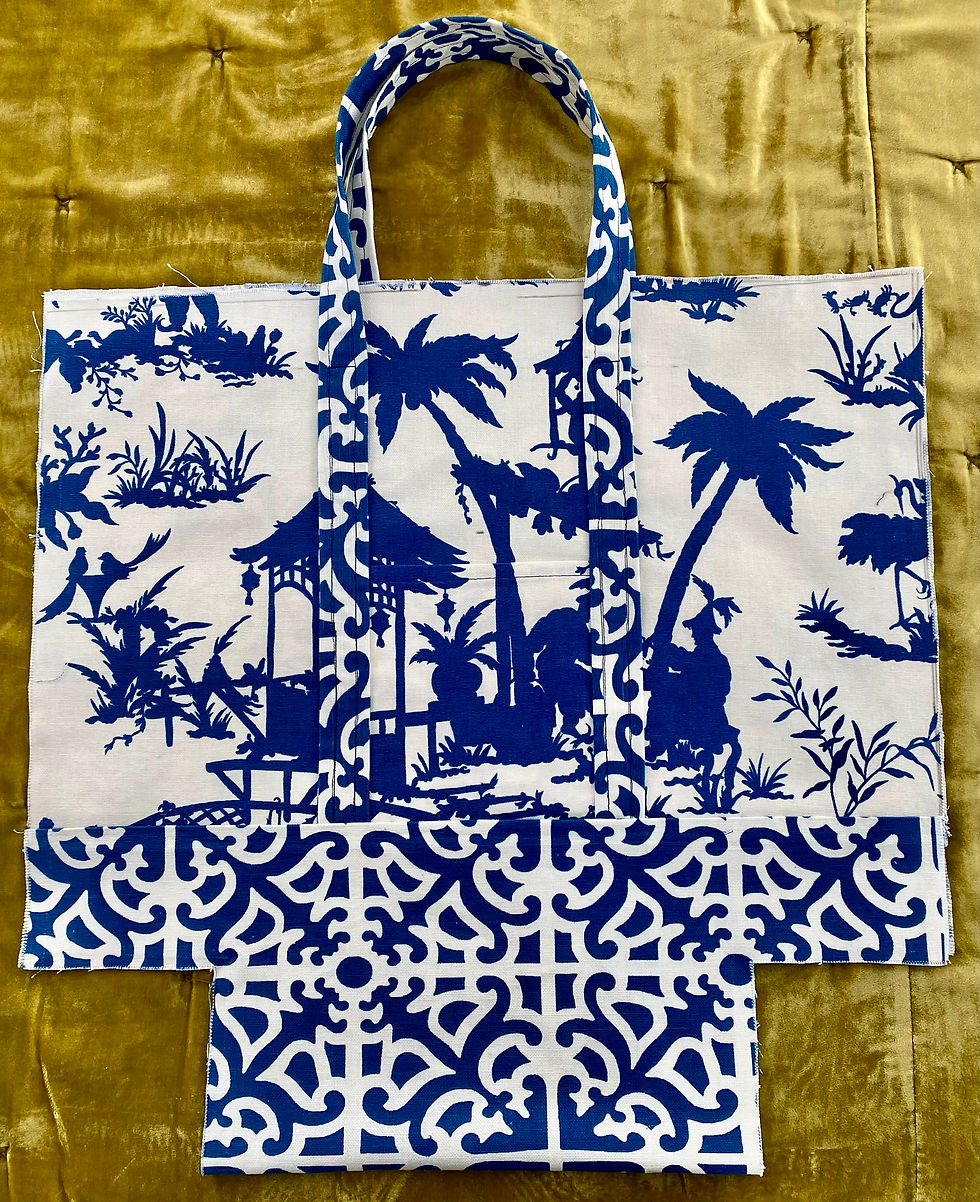
Contrasting textures or colors in your fabric choices can make the tote bag more visually appealing. For example, a navy blue canvas paired with a soft beige linen creates a classic look. Alternatively, a bright patterned cotton with a solid canvas adds a playful touch.
For this project I used two upholstery fabrics, in varying weights. My color palette is white with a vibrant blue pattern. Even though both fabrics have a pattern they complement each other seamlessly.
Cutting the Fabric Pieces
Now that you've chosen your fabrics, it's time to prepare them for assembly.
To achieve a neat finish, accurate cutting is essential. This medium tote bag tutorial includes four pockets on the outside, so plan your fabric layout carefully.
Bag Outer Shell
Cut two panels 22'" wide by 14" long out of your main fabric. This will be your front and back panels for the tote.
Cut three pieces of fusible interfacing. one for the front/back and one for the bottom panel
Cut one bottom panel 22" wide by 17" long out of the accent fabric.
Cut two strap pieces from your accent fabric 4.7" wide by 44" long.
Cut two pocket pieces from the main fabric, about 7" wide by 8" long each.
Bag Lining
Cut one piece of your accent fabric about 22" wide by 42" long.
Cut one piece fusible interfacing the same measurements as the lining fabric.
Cut two pocket pieces from same fabric 14" wide by 7" long.
Mark all pieces with fabric chalk to keep track of pockets and seams.

Interfacing and Fusible Fleece
Adding fusible fleece and interfacing to a tote improves its structure and durability.
Attach the fusible fleece or interfacing to all three outer fabric pieces.
Attach the fusible interfacing to the lining piece.
Follow the instructions on the packaging for your fleece or interfacing.
Sewing the Straps and Pockets
The six-pocket design adds both style and function. This tutorial focuses on sewing two pockets for the front and back of the tote. Then there are four internal pockets.
Prepare the Straps:
a. Fold each handle strip lengthwise with wrong sides together and press.
b. Open the strip and fold each long edge to the center crease, then fold again and press.
c. Sew about 1/8" along both long edges to create sturdy handles.
Prepare the pockets: Fold the top edge of each pocket piece 1/4 inch to the wrong side and press. Next fold another 1/4" and press. Lastly topstitch the fold to create a clean edge.
Attach pockets and straps to the front and back panels:
a. Center and pin a pocket at the bottom of the front panel.
b. Pin the straps along the sides of the pockets, ensuring the straps overlap the pockets.
c. Repeat this process on the back panel.
d. Sew the straps to the pockets and front/back panels, leaving the top and bottom open. Try to align the stitching with the existing stitches on the straps.
This step requires careful pinning and sewing to ensure pockets and straps are straight and secure.

Assembling the Tote Bag
Once the pockets are attached, it’s time to assemble the bag.
Attach bottom panel: Pin the bottom panel to the assembled front/back pieces, match bottom corners right sides facing. Sew across the bottom for both front and back panels.
Topstitching: Apply topstitching to the bottom panel along the seam.
Sew outer Shell: Fold the sewn panel in half, pin, and sew down the sides
Create flat bottom (boxed corners):
a. Measure and mark a 4.5" square at the bottom corners of the bag.
b. Cut squares out
c. Open the fabric and pinch the opposite edges
d. Pin and sew the corner pieces

Instructions for Preparing the Lining Fabric
Prepare lining for pockets: Fold the lining fabric in half, right side out.
Prepare pockets: Fold the top edge of each pocket piece 1/4 inch to the wrong side and press then fold another 1/4" and press. Topstitch the fold to create a clean edge. Measure and mark for the center seam. Fold the sides in 1/4" and press. Then fold the bottom 1/4" and press
Adding pockets to lining: Center the pockets about 3.5" - 4" and pin them to the lining. Unfold the lining fabric; then sew around the pocket edge leaving the top open. Then sew down the center to create two pockets.

Prepare lining: Fold lining right side facing making sure to line up the corners. Next you need to press and pin down the sides.
Sew down the sides; make sure to leave a 4" opening for turnout
Fallow the instruction above for the boxed corners

Connecting the Outer Bag and Lining
Place the outer bag (right side out) inside the lining (wrong side out), so the right sides face each other.
Align the side seams and pin them, then align the top edges and pin all around.
Sew around the edge with a 1/2" seam allowance.
Pull the bag through the turnout opening in the lining.
Sew the gap closed by hand or machine.
Push lining inside the bag and press the top edges flat.

Finishing Touches and Tips
To complete your medium tote bag:
Topstitch around the top edge of the bag to secure the lining.
Press all seams for a crisp finish.
Add optional embellishments like fabric paint, patches, or embroidery to personalize your tote.
Reinforce stress points with extra stitching if you plan to carry heavy items.
This sewing tutorial encourages creativity by allowing you to experiment with fabric combinations and pocket placements to make the bag your own.

Final Thoughts on Making Your Medium Tote Bag
Creating a medium open-top canvas tote bag with two complementary fabrics is a fun and rewarding project that combines functionality with personal style. By following this step-by-step guide, you’ll not only craft a durable and stylish accessory but also enhance your sewing skills along the way. Whether you’re using it for everyday errands, a trip to the beach, or as a thoughtful handmade gift, this tote bag is sure to impress. Don’t be afraid to experiment with different fabric combinations and embellishments to make it uniquely yours. Happy sewing!


Comments